Hi and welcome to Decompiled Art articles!
This is a second part of Unity Tiny Scriptable Pipeline creation series. Here we will work on adding ability to render things out and to get familiar with elements that are responsible for that process.
To follow along, make sure to check previous chapter:
Unity Scriptable Rendering Pipeline DevLog #1: Initial Setup
Now the real fun stuff begins.
Rendering Skyboxes
To start off, lets add a separate method within CustomCameraRenderer that will define what should be rendered. Also, make sure to call it in Render() as well. What you should also do is to SubmitRenderingData() so RenderingPipeline has something to work with.
...
public void Render(ScriptableRenderContext context, Camera camera)
{
    _context = context;
    _camera = camera;

    DrawGeometryData();
    SubmitRenderingData();
}
...
private void DrawGeometryData()
{
    _context.DrawSkybox(_camera);
}


private void SubmitRenderingData()
{
    _context.Submit();
}
...
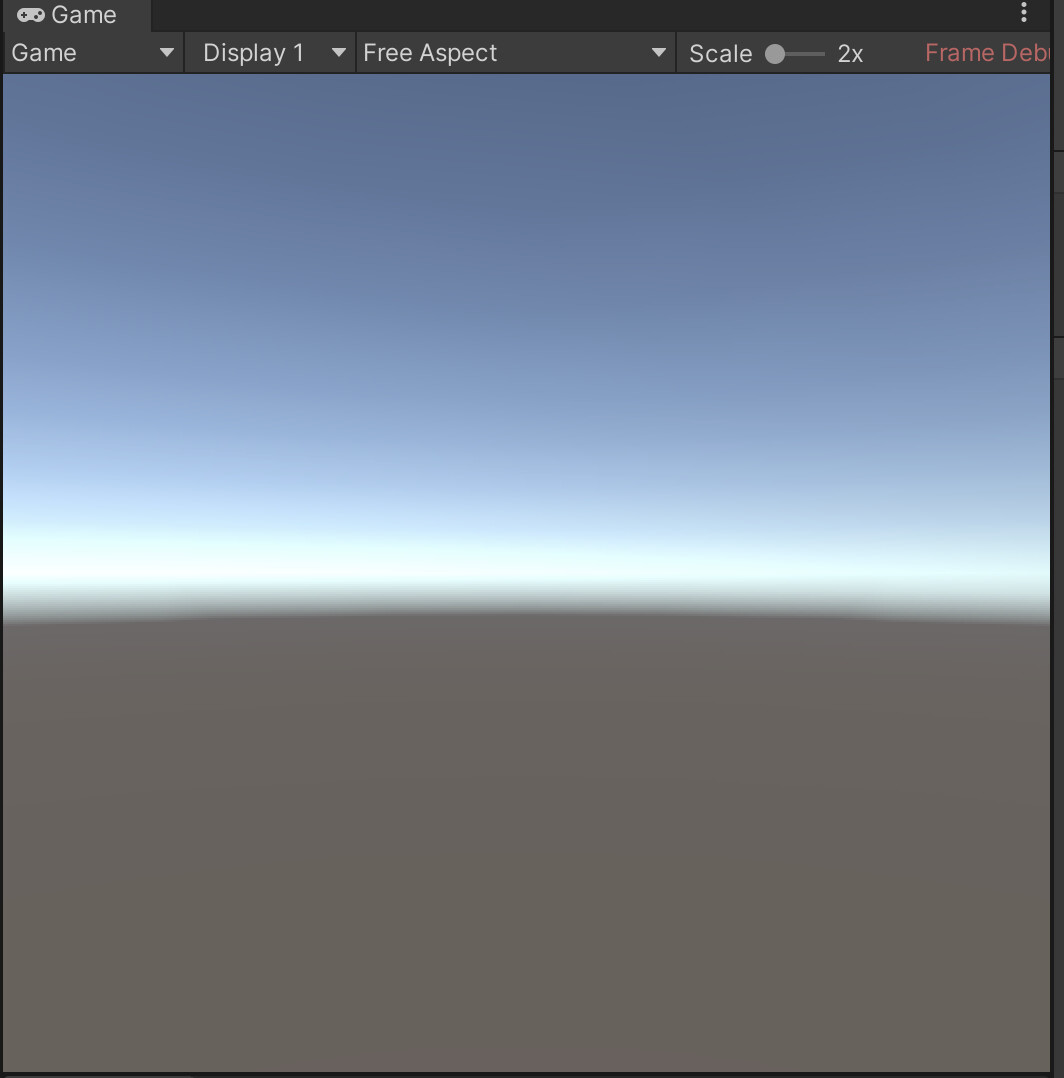
The result of these modifications would be a successful Skybox rendering. However, in order to observer a skybox with correct properties while modifying camera position/rotation, one thing has to be fixed here.
private void CameraRenderingSetup()
{
    _context.SetupCameraProperties(_camera);
}
SetupCameraProperties() sets up view, projection and clipping planes properties for correct rendering. So the final code to render Skybox with CustomCameraRenderer is:
...
public void Render(ScriptableRenderContext context, Camera camera)
{
    _context = context;
    _camera = camera;

    CameraRenderingSetup();
    DrawGeometryData();
    SubmitRenderingData();
}
...
private void CameraRenderingSetup()
{
    _context.SetupCameraProperties(_camera);
}


private void DrawGeometryData()
{
    _context.DrawSkybox(_camera);
}


private void SubmitRenderingData()
{
    _context.Submit();
}
...
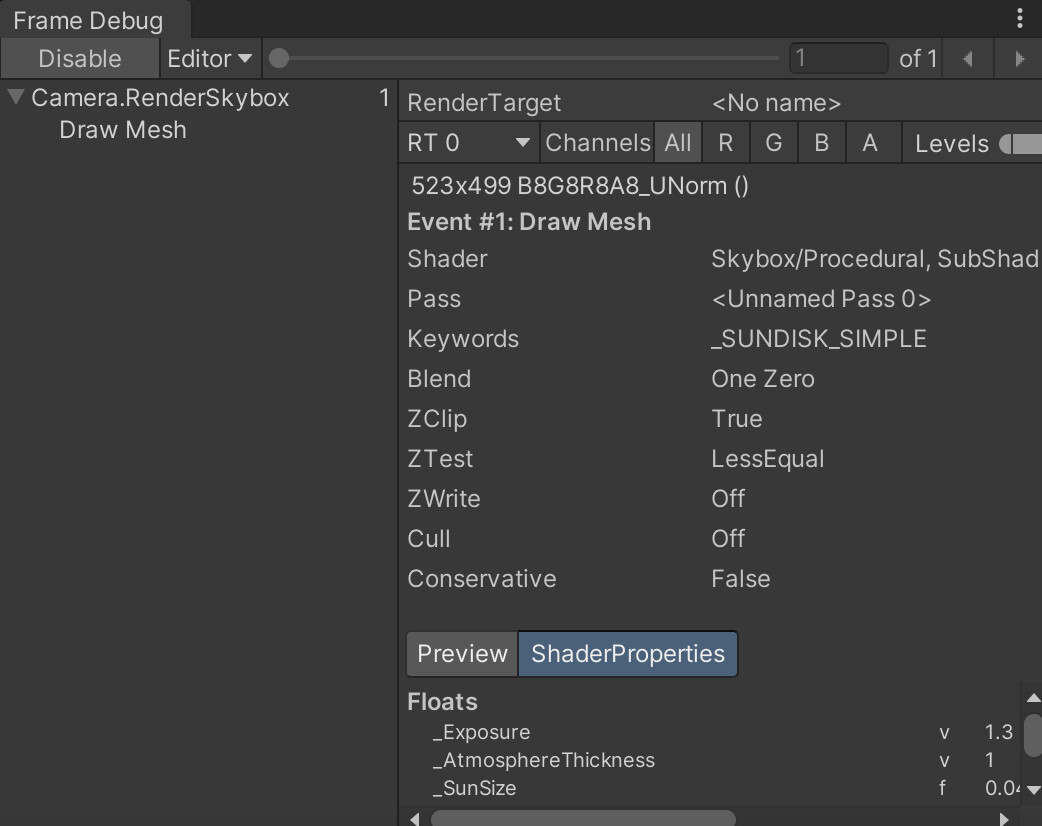
Make sure to check and track Frame Debugger for what's currently processed for rendering.
Frame Clearing
Once frame has been rendered, its data has to be cleared in order to prevent any visual issues while rendering next frame. To help us out there is a ClearRenderTarget() function.
ClearRenderTarget(true, true, Color.clear);
But before we'll implement it, we have to get ourselves familiar with Unity Render Pipeline Command Buffers.
The way rendering Context working is by scheduling chunks of commands for further submission and execution. There are two methods that should be called: BeginSample() and EndSample() in order to formalise a Command Buffer.
At this point we are interested in Command Buffers as a way to organise rendering execution flow. Command Buffer execution is done through ExecuteCommandBuffer() method. When buffer was executed it has to be cleared with Clear() method.
Now lets take a look at some modified (existing) and new code pieces:
Create CommandBuffer
---
private const string CommandBufferLabel = "Render Target";
private CommandBuffer _buffer = new CommandBuffer
{
    name = CommandBufferLabel
};
---
Modified CameraRenderingSetup() method. Here we're clearing up previous frame information and invoking Command Buffer's BeginSample()
private void CameraRenderingSetup()
{
    _context.SetupCameraProperties(_camera);
    _buffer.ClearRenderTarget(true, true, Color.clear);
    _buffer.BeginSample(CommandBufferLabel);
    ExecuteBuffer();
}
Modified SubmitRenderingData() method. Here we're invoking Command Buffer's EndSample() to organise our Rendering Pipeline's execution stack and calling for ExecuteBuffer() method as well (comes next):
private void SubmitRenderingData()
{
    _buffer.EndSample(CommandBufferLabel);
    ExecuteBuffer();
    _context.Submit();
}
With ExecuteBuffer() method we're telling Rendering Pipeline to clear Command Buffer after being executed:
private void ExecuteBuffer()
{
    _context.ExecuteCommandBuffer(_buffer);
    _buffer.Clear();
}
And here's the whole CustomCameraRenderer listing by now:
using UnityEditor;
using UnityEngine;
using UnityEngine.Rendering;


public class CustomCameraRenderer
{
    private ScriptableRenderContext _context;
    private Camera _camera;


    private const string CommandBufferLabel = "Render Target";
    private CommandBuffer _buffer = new CommandBuffer
    {
        name = CommandBufferLabel
    };


    public void Render(ScriptableRenderContext context, Camera camera)
    {
        _context = context;
        _camera = camera;

        CameraRenderingSetup();
        DrawGeometryData();
        SubmitRenderingData();
    }

    private void CameraRenderingSetup()
    {
        _context.SetupCameraProperties(_camera);
        _buffer.ClearRenderTarget(true, true, Color.clear);
        _buffer.BeginSample(CommandBufferLabel);
        ExecuteBuffer();
    }

    private void DrawGeometryData()
    {
        _context.DrawSkybox(_camera);
    }


    private void SubmitRenderingData()
    {
        _buffer.EndSample(CommandBufferLabel);
        ExecuteBuffer();
        _context.Submit();
    }


    private void ExecuteBuffer()
    {
        _context.ExecuteCommandBuffer(_buffer);
        _buffer.Clear();
    }
}
Now lets check out how our current rendering stack is organised by taking a look at Frame Debugger
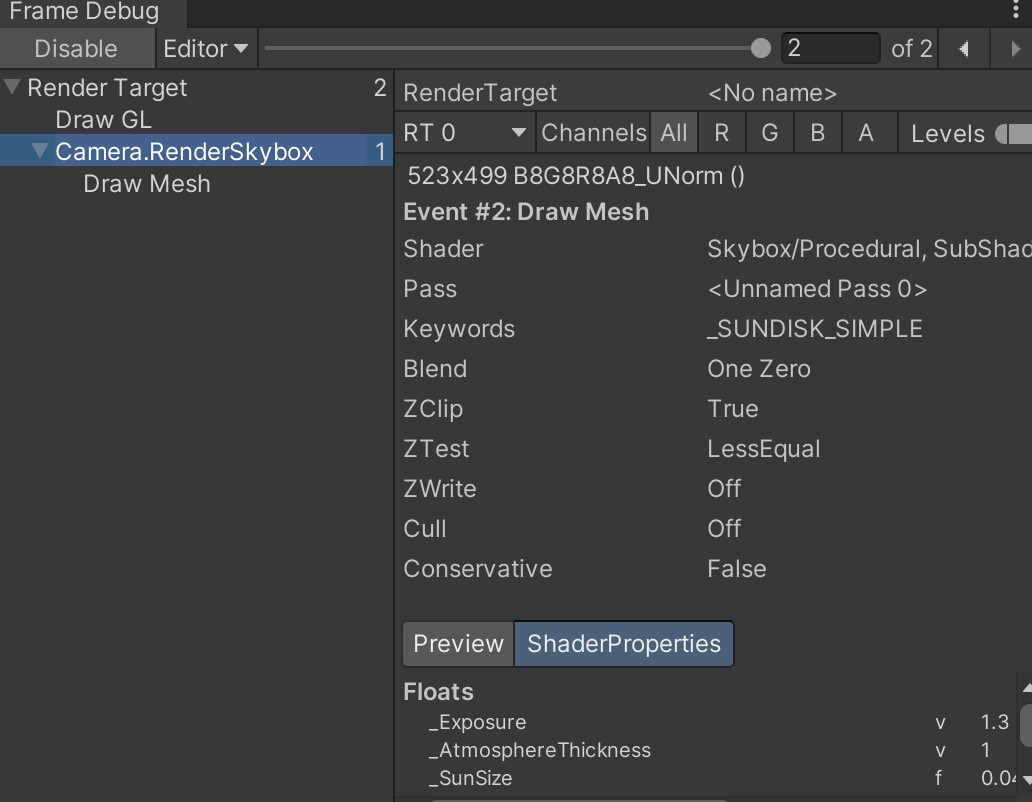
Currently we're pretty much done with the Frame Clearing for now.
Geometry Rendering & Culling
Lets deal with the culling first. What culling actually is?
Culling operation reduces the geometry load in the viewports and/or at render time by filtering out all geometry data outside the camera frustum (camera rendering boundaries).
To store frame culling results Unity uses CullingResults struct. Lets add one as well
private CullingResults _cullingResults;
Next, we need a separate method that will define if it possible to cull provided data.
bool TryCull()
{
    if (_camera.TryGetCullingParameters(out ScriptableCullingParameters cullingParameters))
    {
        _cullingResults = _context.Cull(ref cullingParameters);
        return true;
    }


    return false;
}
TryGetCullingParameters is used here to get culling parameters for a camera. Next step is to implement TryCull() method into our cameras' Render():
public void Render(ScriptableRenderContext context, Camera camera)
{
    _context = context;
    _camera = camera;

    if(!TryCull()) return;

    CameraRenderingSetup();
    DrawGeometryData();
    CameraRenderingSubmit();
}
Now, when we have CullingResults on what has to be drawn, letєs proceed to geometry data rendering.
The basic structure for geometry drawing in Unity with Scriptable Rendering Pipeline is to store DrawingSettings, SortingSettings and FilteringSettings structs to use them DrawRenderers() context-related method.
DrawingSettings provide rules of sorting visible objects (SortingSettings usage) along with defining what shader passes should be used (ShaderTagId usage).
SortingSettings describe the way to sort objects during frame rendering.
FilteringSettings represent how to actually filter objects that Scriptable Rendering Pipeline's Context receives. Should be mentioned that FilteringSettings rely on RenderQueueRange to be set.
To start simple, lets only render unlit objects for now. So we need to provide a correct ShaderTagId for DrawingSettings.
private static readonly ShaderTagId UnlitShaderTagId = new ShaderTagId("SRPDefaultUnlit");
SRPDefaultUnlit defines that currently we're not using any LightMode tag in a pass.
Here's a code sample that makes everything more practical:
private void DrawGeometryData()
{
    var sortingSettings = new SortingSettings(_camera);
    var drawingSettings = new DrawingSettings(UnlitShaderTagId, sortingSettings);
    var filteringSettings = new FilteringSettings(RenderQueueRange.all);


    _context.DrawRenderers(_cullingResults, ref drawingSettings, ref filteringSettings);

    _context.DrawSkybox(_camera);
}
As for now, RenderQueueRange.all was set to render all visible objects without any separation (for example, whether object is Opaque or Transparent). Let's check the results.
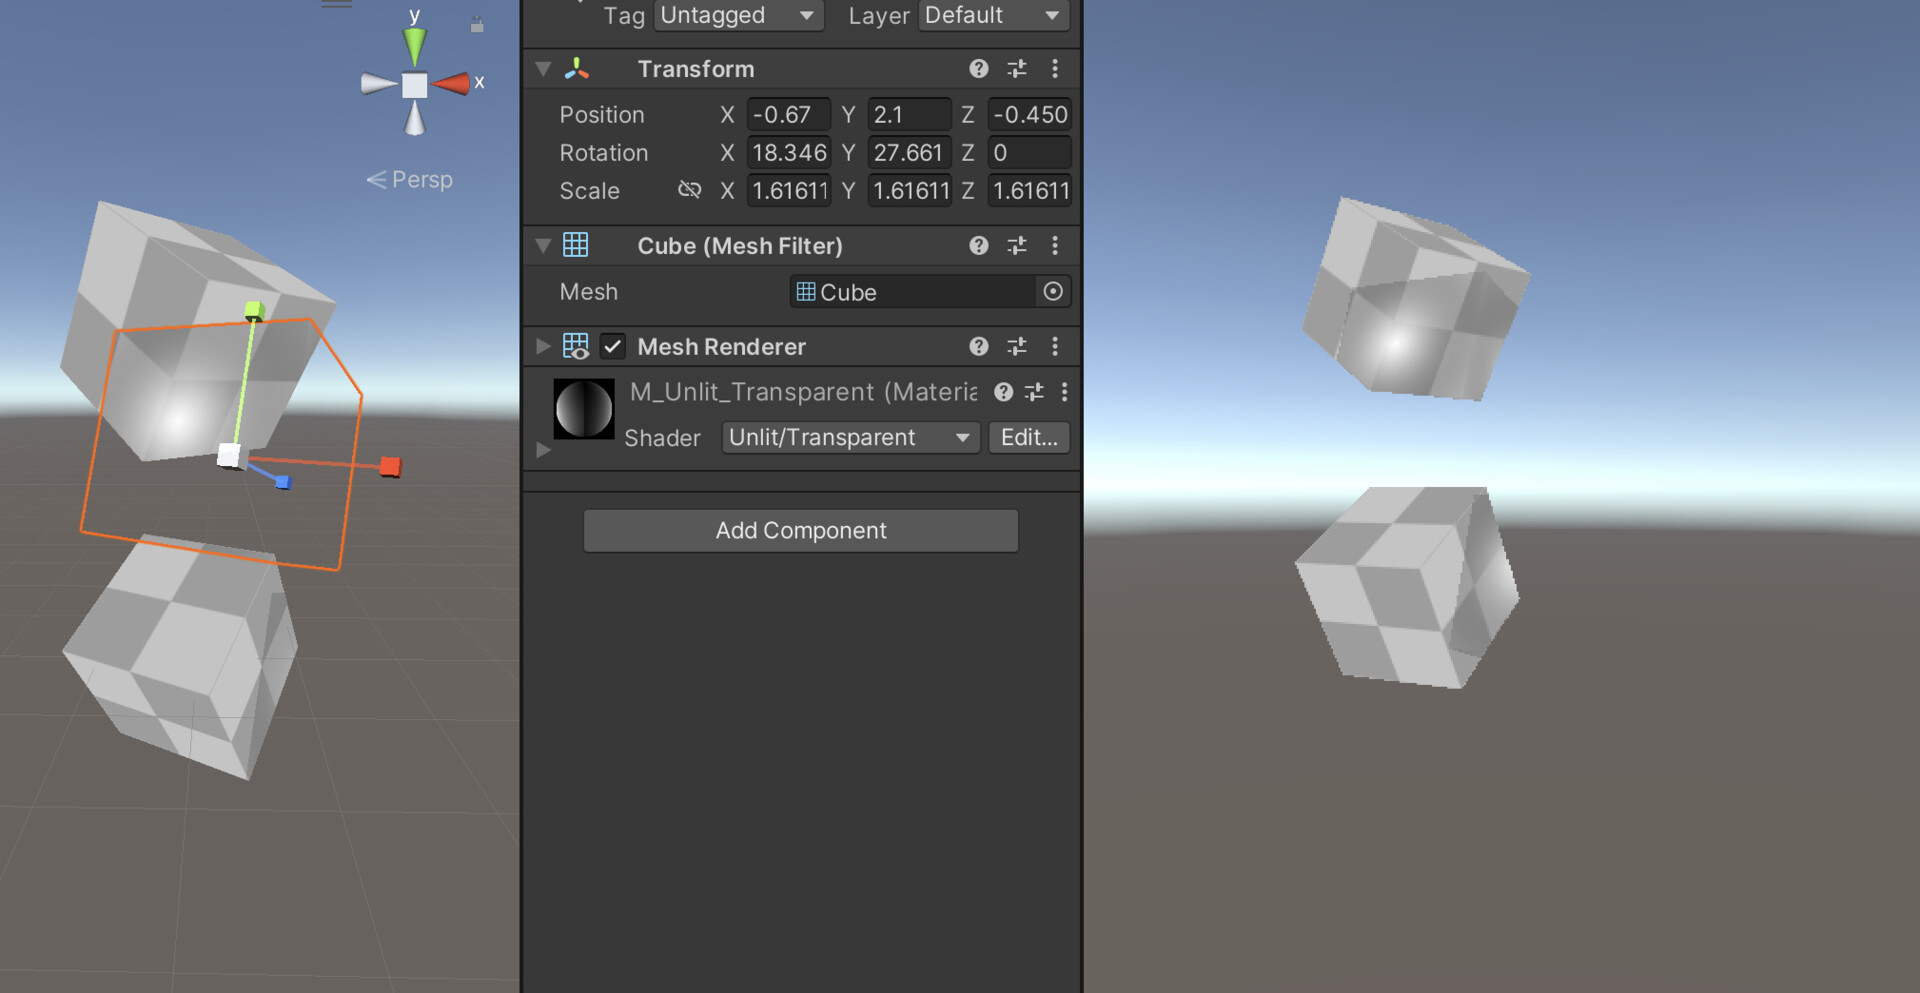
Seems like everything is fine with Opaque geometry and something strange is happening to Transparent ones. Let's analyse the Frame Debug window.
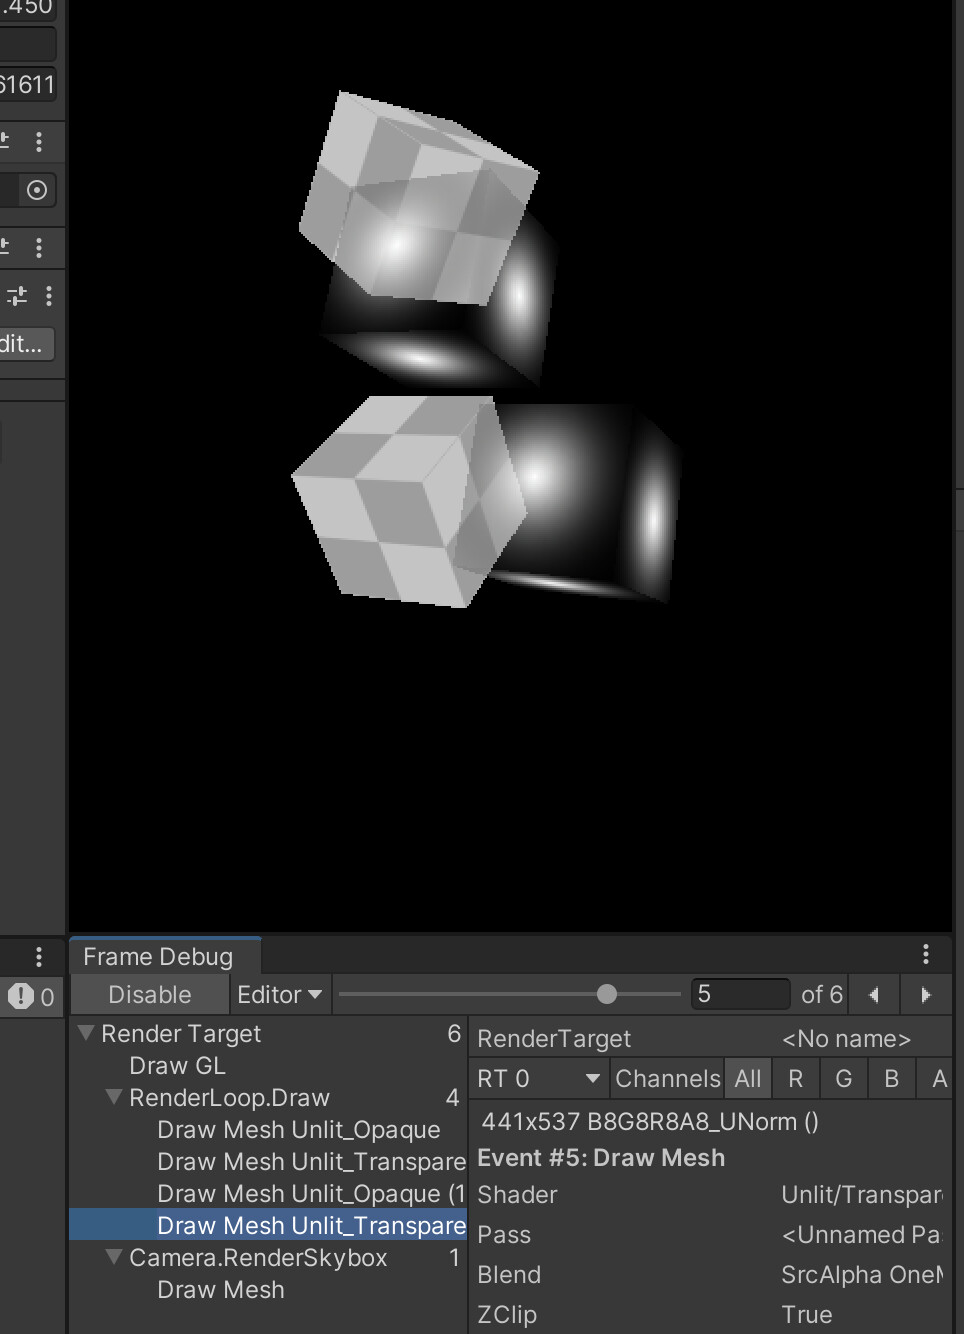
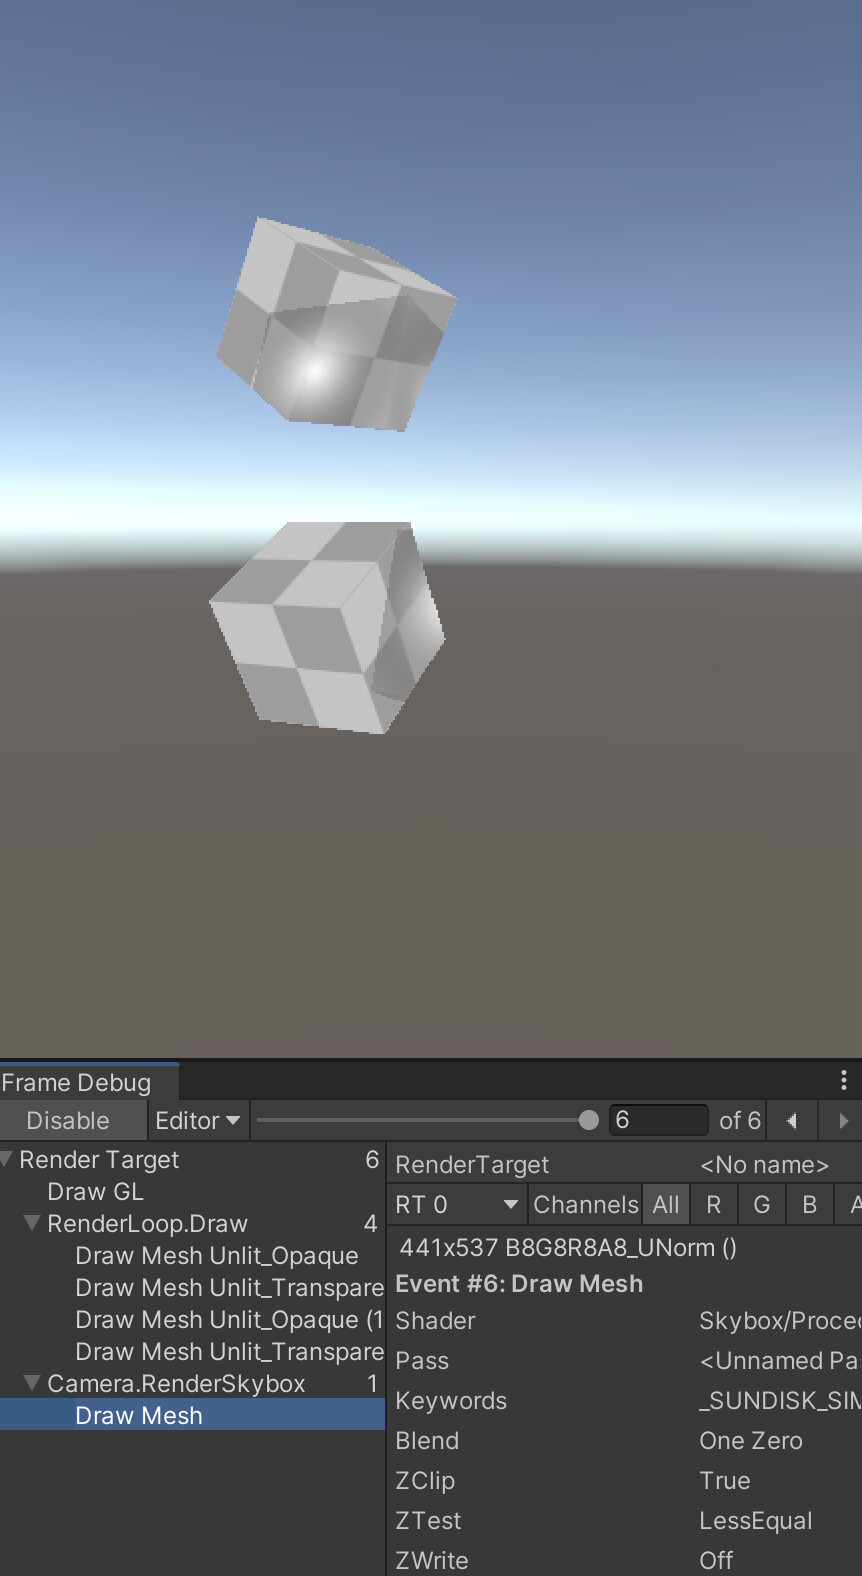
The visual problem is that skybox gets drawn over everything because transparent shaders do not provide any data frame's z-buffer. So we need to provide custom drawing order for opaque, transparent and skybox respectively.
That could be achieved via specifying separate SortingSettings and FilteringSettings
private void DrawGeometryData()
{
     var sortingSettings = new SortingSettings(_camera);
     sortingSettings.criteria = SortingCriteria.CommonOpaque;

     var drawingSettings = new DrawingSettings(UnlitShaderTagId, sortingSettings);
     var filteringSettings = new FilteringSettings(RenderQueueRange.opaque);

     _context.DrawRenderers(_cullingResults,
         ref drawingSettings, ref filteringSettings);

     _context.DrawSkybox(_camera);

     sortingSettings.criteria = SortingCriteria.CommonTransparent;
     filteringSettings.renderQueueRange = RenderQueueRange.transparent;

     _context.DrawRenderers(_cullingResults,
         ref drawingSettings, ref filteringSettings);
}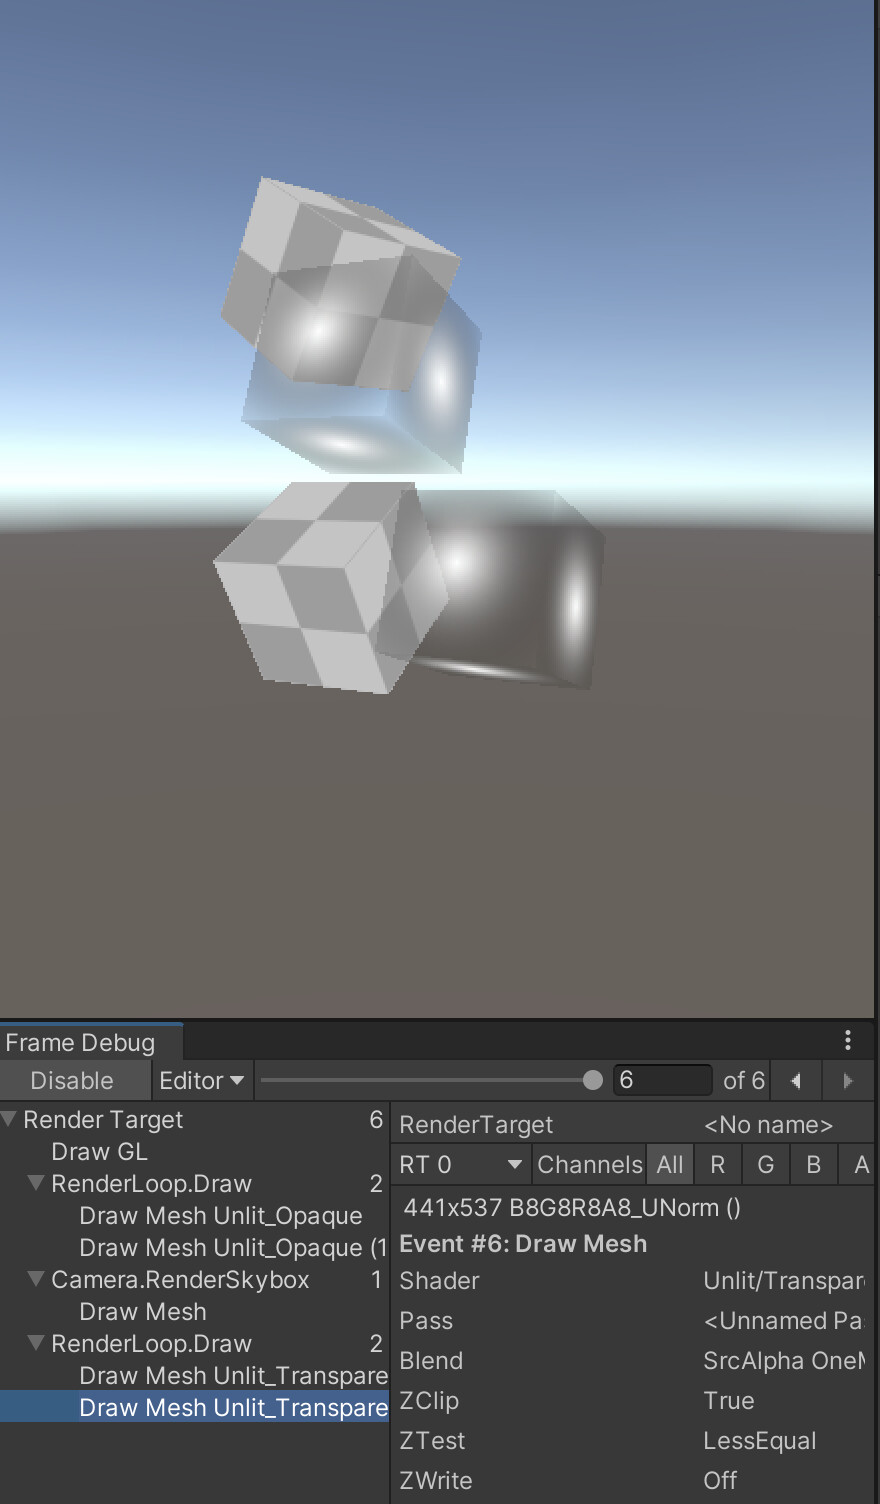
Now everything is sorted and rendered correctly. Congratulations! See you in the next chapter.
Hope you've enjoyed with provided info and thanks a lot! Stay tuned!
Support Decompiled Art on Patreon

Support Decompiled Art with Ko-fi

***
FOLLOW AND CHECK FOR UPDATES:
Decompiled Art YouTube
Decompiled Art Instagram
Decompiled Art Twitter
Decompiled Art Facebook
***