Hi and welcome to Decompiled Art articles!
In this blog series, we'll go on a journey to discover what compute shaders are, create your own ones and explore their use in a variety of applications. We'll dive not only into the technical details, but also provide examples and real-world use cases to help you see the potential of this exciting technology. All the relevant results will be generated in Unity to demonstrate the concepts.
In the first part, we'll get ourselves familiar with GPU Computing in general and emphasize the potential of compute shaders along with the vast range of tasks that they are capable to perform.
GPU Computing
GPU computing has become increasingly popular in recent years due to the ability of modern graphics processing units (GPUs) to perform complex calculations in parallel, which makes them well-suited for a wide range of applications. Here are some examples of GPU computing applications:
- Scientific simulations: GPUs are commonly used for scientific simulations, such as climate modeling, astrophysics, and molecular dynamics. These simulations require vast amounts of data to be processed, which can be done efficiently using the parallel processing power of GPUs
- Machine learning: Machine learning algorithms often require the processing of large amounts of data, which can be done more efficiently using GPUs. GPUs can accelerate tasks such as training neural networks, which is a fundamental component of many machine learning applications.
- Video processing: GPUs can be used to accelerate video processing tasks, such as video encoding, decoding, and transcoding. This allows for faster rendering times and better quality output.
- Gaming: GPUs have long been used for gaming applications, as they can render high-quality graphics and provide smooth performance. However, GPUs can also be used for non-graphics tasks in games, such as physics simulations and artificial intelligence.
In recent times, the number of GPU computing applications has surged, and the list of available solutions continues to expand. Among the most widely used frameworks in this domain are CUDA, OpenCL, DirectCompute, and Metal.

These frameworks enable developers to write code that can execute on GPUs, taking advantage of the massive parallelism offered by GPU architectures. They allow for efficient utilization of GPU resources, enabling computations to be performed in parallel across numerous processing cores.
Compute Shaders
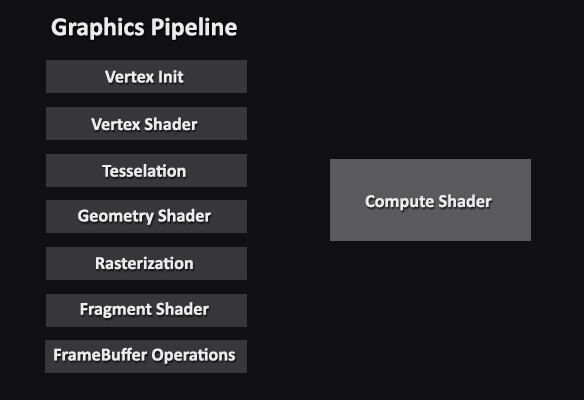
First introduced by NVIDIA in 2006, compute shaders are a type of shader program that run on the graphics processing unit (GPU) and are designed to perform general-purpose computing tasks. Unlike traditional graphics shaders, which are used to render images, compute shaders can be used for a wide range of tasks. It is worth noting that they are not included by default in the Graphics Pipeline (even they are using GPU Hardware).
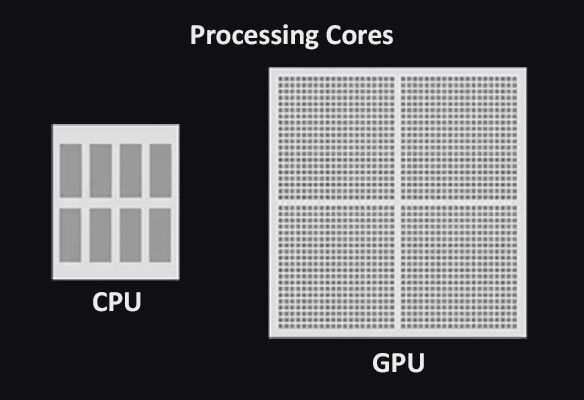
What makes compute shaders so powerful is their ability to harness the parallel processing power of modern graphics cards. With hundreds or even thousands of processing cores, a graphics card can perform computations that would take a traditional CPU-based program hours or even days to complete.
Because modern graphics cards have many processing cores, compute shaders can take advantage of this parallelism to perform computations much faster than traditional CPU-based programs. This makes them useful for a wide range of applications, from scientific simulations to video games.
So, the primary distinction between CPU and GPU architecture lies in their design objectives. CPUs are optimized for swift execution of a diverse range of tasks, typically measured by clock speed, but they have limitations in terms of concurrent task processing. On the other hand, GPUs are specifically engineered for concurrency.
Compute Shaders implementation in Unity
Compute shaders in Unity are closely aligned with the DirectX11 DirectCompute technology. The language used - HLSL.
They are compatible with a variety of platforms
- Windows and Windows Store (with a DirectX 11 or DirectX 12 graphics API and Shader Model 5.0 GPU)
- macOS and iOS (using Metal graphics API)
- Android
- Linux, and Windows platforms with Vulkan API, OpenGL platforms (OpenGL 4.3 on Linux or Windows; OpenGL ES 3.1 on Android).
- Modern game consoles.
In essence, Unity transforms the application code into platform-specific code that can be interpreted by the appropriate graphics API, depending on the target platform.
First Compute Shader
As this is the first article in a series, there is a high-level overview provided rather than delving into intricate technical details. Our focus will be on understanding the fundamentals of creating and utilizing compute shaders within Unity.
First, make sure that your system supports computes. In Unity, this information can be provided by SystemInfo.supportsComputeShaders.
In this sample, I've created a simple UI structure to visualize computes support.
Create a new C# script (named CheckComputeSupport in my case) and add it as a new component to any gameObject that is currently present on Scene (gameObject named CheckSupport in my case).
Script to check if Computes supported:
public class CheckComputeSupport : MonoBehaviour
{
    [SerializeField] private TMP_Text text;
    private void Start()
    {
        if(text != null)
            text.text = "Support Compute: " + SystemInfo.supportsComputeShaders;
    }
}
As you turn on the Play mode, it will produce such result:
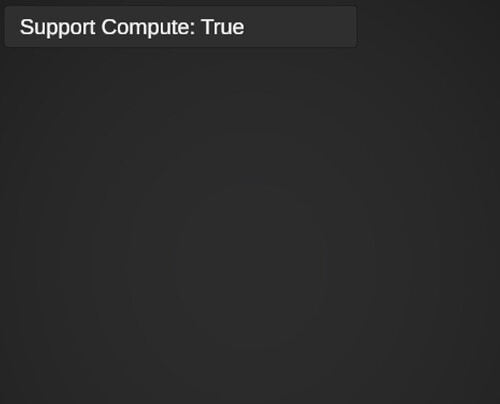
If it's true, we can move on and create our first implementation of compute shaders.
Create new compute shader (named CS_00 in my case) and C# (named GenerateRenderTexture in my case) script to Dispatch it.
Also, add new Quad gameObject and set an Unlit material to it. For this, I've created a new default Unlit shader and set it to be used by M_Unlit_01 material.
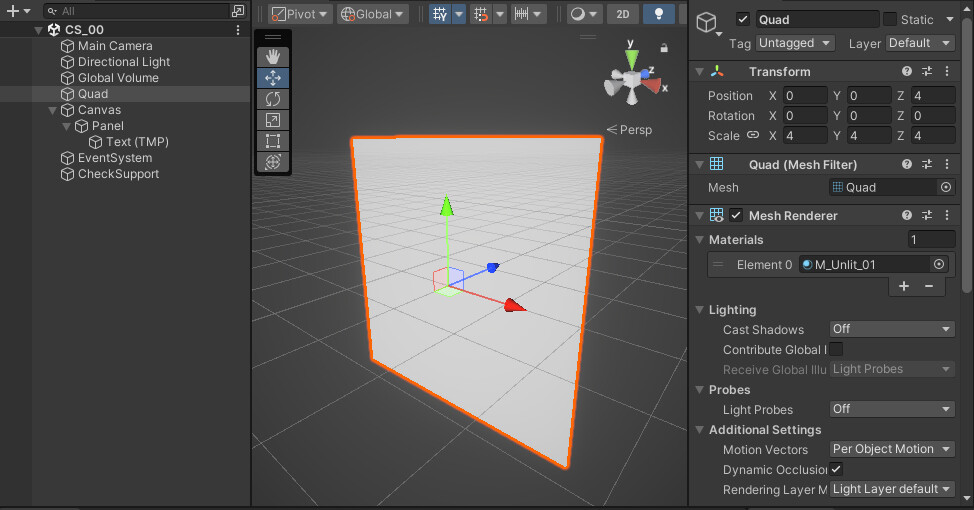
Next, open newly created C# script and paste this code:
using UnityEngine;

namespace CS_00
{
    [RequireComponent(typeof(Renderer))]
    public class GenerateRenderTexture : MonoBehaviour
    {
        [SerializeField] private ComputeShader computeShader;
        [SerializeField] private string kernelName = "CSMain";
        [SerializeField] private int resolution = 128;

        private RenderTexture _renderTexture;
        private int _kernelHandle;

        private Renderer _renderer;
        private static readonly int MainTex = Shader.PropertyToID("_MainTex");

        private void Start()
        {
            //GET RENDERER COMPONENT REFERENCE
            TryGetComponent(out _renderer);

            //CREATE NEW RENDER TEXTURE TO RENDER DATA TO
            _renderTexture = new RenderTexture(resolution, resolution, 0)
            {
                enableRandomWrite = true
            };
            _renderTexture.Create();

            //COMPUTE SHADER & RESULTING RENDERTEXTURE SETUP
            _kernelHandle = computeShader.FindKernel(kernelName);
            computeShader.SetTexture(_kernelHandle, "Result", _renderTexture);
            _renderer.sharedMaterial.SetTexture(MainTex, _renderTexture);

            computeShader.Dispatch(_kernelHandle, resolution/8, resolution/8, 1);
        }
        private void OnDisable()
        {
            if (_renderTexture != null)
                Destroy(_renderTexture);

            _renderer.sharedMaterial.SetTexture(MainTex, null);
        }
    }
}
For Compute shader, use this code:
#pragma kernel CSMain

RWTexture2D<float4> Result;

[numthreads(8,8,1)]
void CSMain (uint3 id : SV_DispatchThreadID)
{
    Result[id.xy] = float4(id.x & id.y, (id.x & 15)/15.0, (id.y & 15)/15.0, 0.0);
}
No worries, in upcoming articles we will break down the code used for compute shader, as well as contained within C# script.
Add GenerateRenderTexture component to the Quad gameObject (AddComponent -> GenerateRenderTexture). It will add a new component with default values set.
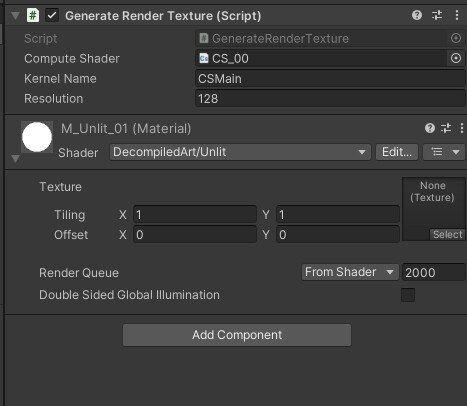
Turn on PlayMode and check the result, that should be somewhere similar to this:
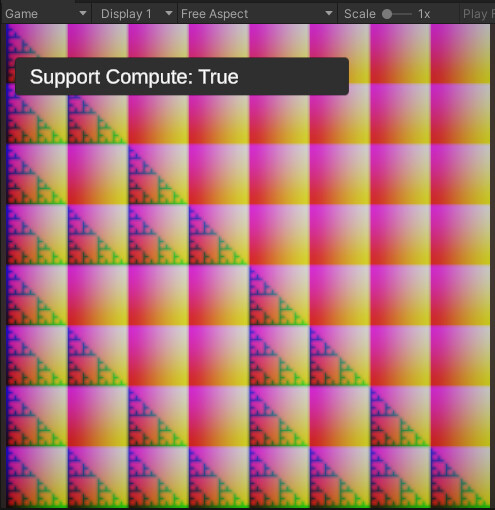
Congratulations on successfully setting up and running your initial compute shader. As previously mentioned, in the upcoming article, we will delve into the technical intricacies and fundamental structural components that a compute shader is consists of.
Thanks a lot for attention, and until the next time!
Support Decompiled Art on Patreon
(and get source files for this article)

Support Decompiled Art with Ko-fi

***
FOLLOW AND CHECK FOR UPDATES:
Decompiled Art YouTube
Decompiled Art Instagram
Decompiled Art Twitter
Decompiled Art Facebook
***